How to sort taxonomies in WordPress Admin panel
WP Adminify's Post Type Orders feature also enables you to sort taxonomies like categories, tags, and custom taxonomies within the WordPress admin panel. This is useful for organizing hierarchical or flat taxonomies, making it easier to manage content. Follow the steps below to learn how to sort taxonomies using this feature.
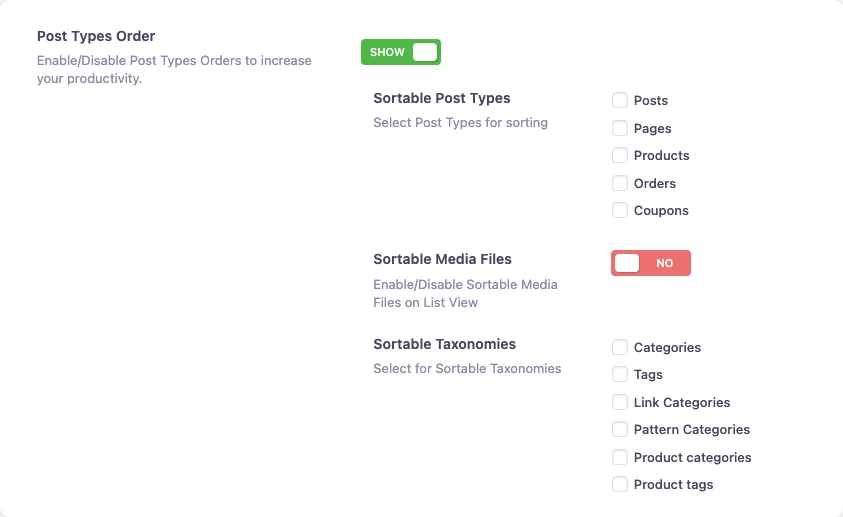
1. Enable the Post Type Orders Feature
To start, make sure the Post Type Orders feature is activated in WP Adminify:
- Navigate to WP Adminify > Productivity > Post Type Orders.
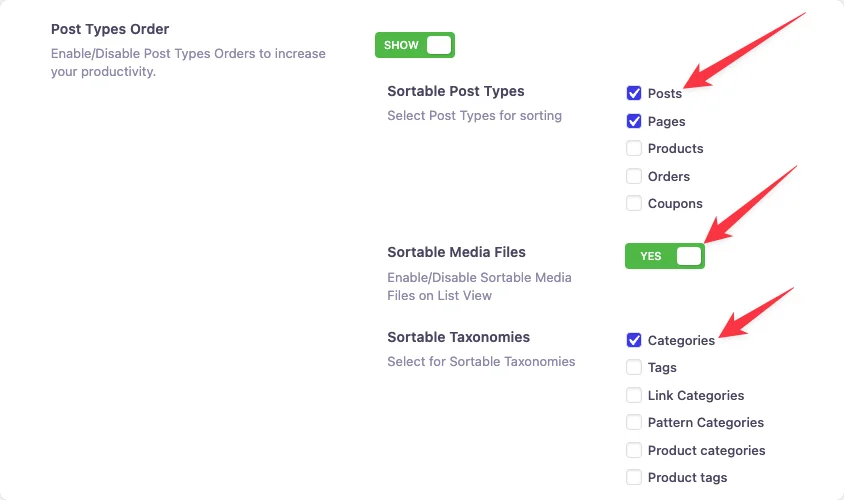
- Toggle the Post Type Orders feature to "Show."

2. Enable Sortable Taxonomies
After enabling the feature, activate sorting for taxonomies:
- Under the Sortable Taxonomies section, select the taxonomies you want to sort (e.g., Categories, Tags, Custom Taxonomies).
- Check the boxes for the taxonomies you want to include.

3. Navigate to the Taxonomy You Want to Sort
Once you've enabled sortable taxonomies, go to the specific taxonomy you want to reorder:
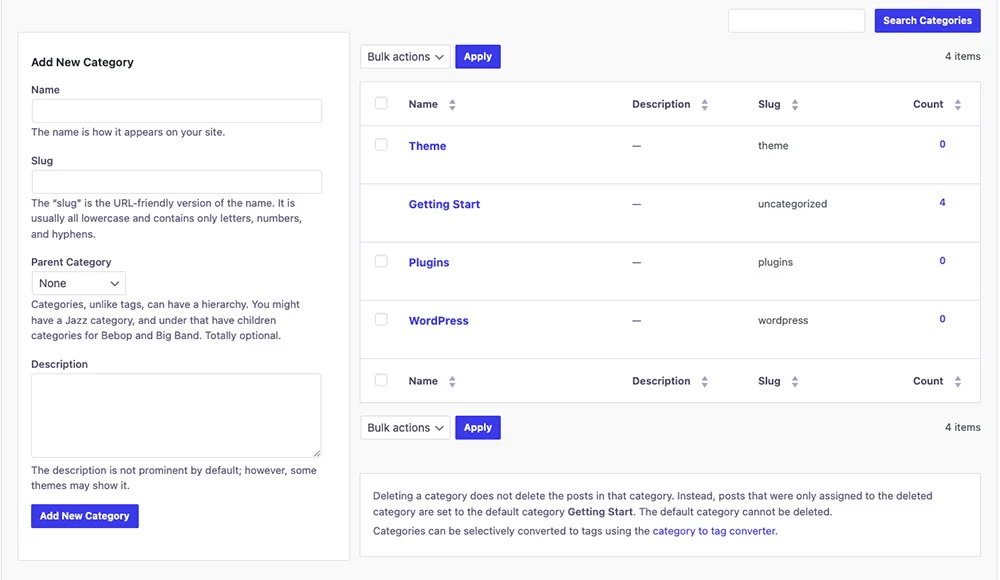
- For Categories, navigate to Posts > Categories.
- For Tags, go to Posts > Tags.
- For custom taxonomies, navigate to their respective sections in the WordPress admin panel.

4. Sort Taxonomies via Drag and Drop
Now that you're in the taxonomy management page, you can reorder the items:
- Simply click and drag a taxonomy (e.g., a category or tag) to a new position.
- Drop it where you want it to appear.
- The order is automatically saved after you adjust the items.
5. Verify the New Order
Once you’ve sorted the taxonomies, the new order will be reflected in the admin panel and on the front end (if applicable). The changes will persist, making it easier to organize your taxonomies for better content management.
Didn’t find what you were looking for? Get in touch!
Updated on December 2, 2024
Was this helpful to you?